Ever tried to measure something and ended up with more confusion than clarity? You’re not alone! Tape measures can be tricky if you’re not familiar with their markings. But fear not! We’re here to break it down for you. Understanding tape measure markings is essential for any DIY project, from hanging a picture to building a shed.
Let’s discuss the nitty-gritty and demystify those little lines.
Basics of a Tape Measure
First things first, let’s get acquainted with the tool itself. A tape measure typically consists of:
- Hook: The metal end that grabs onto the edge of whatever you’re measuring.
- Blade: The long, flexible strip with all those confusing markings.
- Lock Mechanism: Keeps the blade from retracting while you measure.
- Housing: The outer shell that holds it all together.
Think of it as a retractable ruler with a bit more complexity. But don’t worry, we’ll make it simple!
Types of Markings
Tape measures are packed with information. Here’s a breakdown:
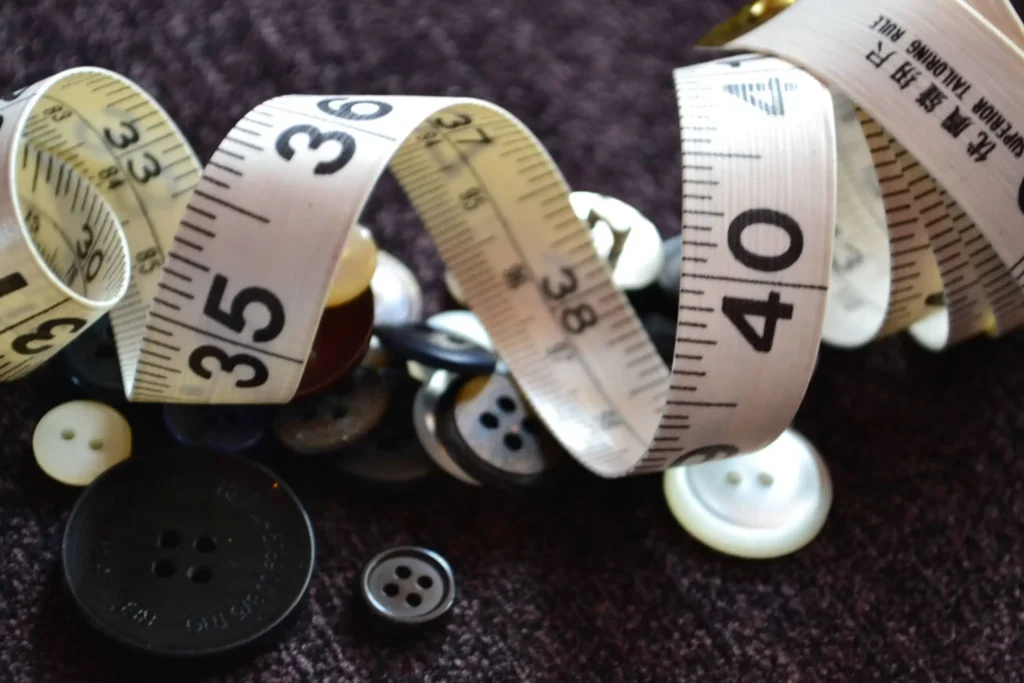
Inches and Fractional Marks
These are the bread and butter of tape measures:
- Inch Marks: Usually the largest numbers on the blade.
- Half-Inch Marks: Smaller but still noticeable.
- Quarter-Inch Marks: Even smaller, dividing the half-inch marks.
- Eighth-Inch Marks: Tiny lines that further divide the quarter-inch marks.
- Sixteenth-Inch Marks: The smallest, dividing the eighth-inch marks.
Here’s a quick visual:
| Fraction | Example |
|---|---|
| 1/2″ | 0.5 |
| 1/4″ | 0.25 |
| 1/8″ | 0.125 |
| 1/16″ | 0.0625 |
Metric Markings
Some tape measures use the metric system:
- Centimeters: Larger numbers.
- Millimeters: Smaller marks between the centimeter marks.
Specialty Markings
Specialty markings make specific tasks easier:
- Stud Marks: Typically every 16 inches.
- Black Diamonds: Every 19.2 inches, useful for truss layouts.
Step-by-Step Guide on Reading the Markings
- Identify the Whole Inch: Start with the largest number.
- Find the Fraction: Look at the smaller lines between the whole inches.
- Combine Them: Add the fraction to the whole inch for your final measurement.
Example: If you’re at 3 inches and the next smallest line is a quarter inch, you’re at 3 1/4 inches.
Visual Aids
Use diagrams to understand better. Imagine a tape measure zoomed in to see the marks clearly.
Tips and Tricks
- Use the Hook: The hook helps keep your tape steady.
- Read Straight On: Avoid parallax errors by looking straight down at the tape.
Using a Tape Measure Effectively
Knowing how to read the markings is half the battle. Here’s how to use your tape measure like a pro:
Accurate Measuring Techniques
- Keep the Tape Straight: Ensure the tape is taut and straight.
- Use the Lock: Lock the blade in place to avoid it moving.
- Double-Check: Always measure twice to avoid mistakes.
Measuring Different Objects
- Inside Measurements: Use the hook inside the object.
- Outside Measurements: Use the hook on the outer edge.
Common Issues and Fixes
- Retracting Problems: If the blade doesn’t retract smoothly, it might need cleaning or a bit of lubrication.
- Damaged Hook: Bent or loose hooks can be fixed by carefully bending them back or tightening screws.
Conclusion
Understanding tape measure markings might seem daunting at first, but with a little practice, you’ll be reading them like a pro. Whether you’re a weekend warrior or a seasoned DIY enthusiast, mastering this tool is a game-changer.
FAQs
Let’s address some common questions:
- What do the red numbers mean?: Red numbers often indicate special markings like stud intervals.
- How do I measure round objects?: Wrap the tape around the object and read the measurement at the point where the tape meets the starting point.

Matthew Dowell
Matthew, a seasoned builder from a family of craftsmen, leads Tools Trove. His passion for tools and decades of hands-on experience fuel his commitment to providing expert reviews and insightful content. Whether you’re a pro or a DIY enthusiast, Matthew’s guidance ensures informed decisions in the world of tools.