Ever wondered what packs a punch in assembly projects without the muscle strain? Enter the pneumatic rivet gun, your go-to tool for heavy-duty fastening tasks. Unlike its manual and battery-powered cousins, this air-powered wizard is all about getting the job done efficiently, especially in manufacturing and construction where time equals money.
Tools and Materials Needed
Before we get into the steps, let’s gather the gang. You’ll need:
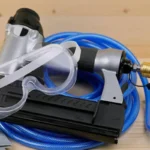
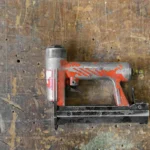
- A pneumatic rivet gun—choose this based on the job at hand.
- A range of rivets—size matters, so match these to your materials.
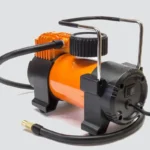
- An air compressor—that’s your power source.
- Safety gear—goggles and gloves, because safety never takes a holiday.
Setting Up the Pneumatic Rivet Gun
Now, let’s set the stage for some riveting action! First, connect your rivet gun to the air compressor. This is where you’ll pay close attention to the compressor’s settings. Too much power and you could damage the materials; too little, and the rivet won’t hold. Aim for the Goldilocks zone—just right. Adjust the pressure according to the manufacturer’s instructions, usually found in the rivet gun’s manual. Remember, this isn’t a one-size-fits-all situation, so tweak the settings based on what feels right for your specific project.
Step-by-Step Guide to Using a Pneumatic Rivet Gun
Preparation
First off, size up your materials and drill holes just big enough for the rivets. Think of it as prepping a canvas for painting—it needs to be just right. Make sure those holes are clean; debris could throw a wrench in the works. Now, grab a rivet that fits snugly into your masterpiece-in-waiting.
Rivet Installation
Line up the rivet gun with the hole like you’d aim a dart—steady and precise. Activate the gun with a firm press. This isn’t the time for a gentle tap; you need a solid squeeze. The rivet will pop into place, binding your materials with the ease of a professional. Check the connection; if it wobbles, it’s a no-go. Repeat until you feel like the king or queen of riveting.
Finishing Touches
Take a moment to inspect your work. Are the rivets flush and firm? Good. If not, adjust your technique. Maybe hit it a bit harder next time or check if the rivet size was off. Riveting isn’t just about power; it’s about finesse.
Always gear up! Safety goggles and gloves aren’t just fashion statements; they’re your best buds in the DIY realm. And keep that trigger locked when not in use—accidental firings are no joke.
Frequently Asked Questions
Q: Can I use aluminum rivets on steel?
A: Yes, but match the rivet material to the most corrosive material being joined to avoid galvanic corrosion.
Q: What if the rivet won’t compress?
A: Double-check the size and material compatibility. If all else fails, your gun might need a tune-up.
Follow these steps and tips, and you’ll wield your pneumatic rivet gun like a pro, ensuring your projects aren’t just complete, but completed with confidence and skill. Happy riveting!

Matthew Dowell
Matthew, a seasoned builder from a family of craftsmen, leads Tools Trove. His passion for tools and decades of hands-on experience fuel his commitment to providing expert reviews and insightful content. Whether you’re a pro or a DIY enthusiast, Matthew’s guidance ensures informed decisions in the world of tools.