Is your key fob acting up, or has it stopped working altogether? Don’t worry! Replacing the battery in your key fob is a straightforward task that you can handle yourself without needing a trip to the dealership. A functional key fob is essential for modern car owners, providing convenience and security.
Let’s get your key fob back in action.
Tools and Materials Needed
Before we start, let’s gather the necessary tools. Here’s what you’ll need:
- Small flat-head screwdriver or a precision screwdriver set.
- Replacement battery (typically CR2032 or CR2025).
These tools are commonly found in most households or can be purchased at any hardware store.
Step-by-Step Guide to Replacing Your Key Fob Battery

Step 1: Identify Your Key Fob Type
First things first, you need to determine the type of key fob you have and the specific battery it uses. This information is often available in your car’s user manual or by doing a quick online search with your car model and year.
Step 2: Gather Necessary Tools
Make sure you have all the tools ready before you start. Trust me, nothing’s more annoying than halfway through a job and realizing you’re missing something crucial.
Step 3: Locate the Battery Compartment
Most key fobs have a battery compartment that is easy to access. Look for a small seam or gap around the fob. This is where you’ll insert your tool to pry it open. Some models may have a tiny screw that you’ll need to remove first.
Step 4: Open the Battery Compartment
Using your small flat-head screwdriver, gently pry open the battery compartment. Insert the screwdriver into the seam and twist it slightly to pop the cover open. Be careful not to use excessive force to avoid damaging the fob.
Step 5: Remove the Old Battery
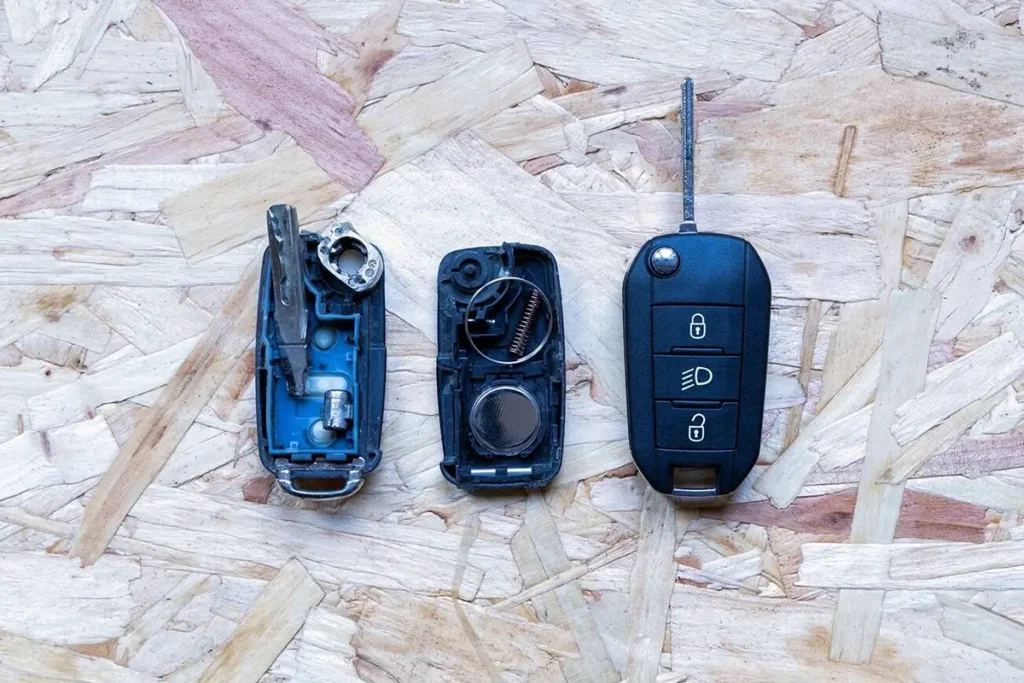
Once the compartment is open, you’ll see the old battery. Carefully remove it by lifting it out with your fingers or using the screwdriver if it’s snug. Pay attention to how the battery is positioned; you’ll need to insert the new one the same way.
Step 6: Insert the New Battery
Take your new battery and place it into the compartment, ensuring the positive and negative terminals are aligned correctly. Usually, the positive side faces up, but double-check against the old battery’s position.
Step 7: Close the Battery Compartment
Snap the battery cover back into place or screw it back on if your fob has a screw. Make sure it’s secure to prevent the battery from falling out.
Step 8: Test the Key Fob
Now, it’s time to test your handiwork. Try locking and unlocking your car doors, starting the engine, or using any other functions your key fob controls. If everything works, you’ve successfully replaced the battery.
Tips and Troubleshooting
Here are some additional tips to keep your key fob in tip-top shape:
- Battery Life: To extend the battery life, avoid pressing buttons unnecessarily and keep the fob away from extreme temperatures.
- Spare Battery: Always keep a spare battery handy. It’s a lifesaver when the current one dies unexpectedly.
- Troubleshooting: If your key fob doesn’t work after replacing the battery, double-check the battery orientation. Also, ensure the contacts inside the fob are clean and not corroded.
Conclusion
Replacing your key fob battery is a quick and easy task that can save you time and money. With just a few simple steps, you can ensure your key fob is working perfectly, providing the convenience and security you rely on.
FAQs
Q: How often should I replace my key fob battery?
A: Typically, every 1-2 years, but it depends on usage.
Q: What if my key fob still doesn’t work after replacing the battery?
A: Check for corrosion on the battery contacts and ensure the battery is seated correctly. If it still doesn’t work, the issue might be more serious and require professional assistance.
Q: Can I use any brand of battery?
A: While most brands will work, it’s best to use a reputable brand to ensure longevity and reliability.

Matthew Dowell
Matthew, a seasoned builder from a family of craftsmen, leads Tools Trove. His passion for tools and decades of hands-on experience fuel his commitment to providing expert reviews and insightful content. Whether you’re a pro or a DIY enthusiast, Matthew’s guidance ensures informed decisions in the world of tools.


