Changing a tire is a fundamental skill that every driver should possess. With the right tools and knowledge, you can replace a flat tire with a spare, ensuring you’re not left stranded on the side of the road. This guide will walk you through the essential tools needed and the steps to safely and efficiently change a tire.
Necessary Tools
To change a tire, you’ll need several key tools:
- Lug Wrench: For loosening and tightening the lug nuts that hold your wheels in place.
- Jack: To lift the vehicle off the ground so the tire can be changed. Ensure you have a suitable jack for your vehicle’s weight.
- Wheel Wedges: To prevent the car from rolling once it is jacked up.
- Tire Gauge or Portable Tire Inflator: To check and adjust the tire pressure after installation.
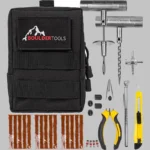
A comprehensive tire change kit, like the Husky 9-Piece Tire Change Kit available at Home Depot, is recommended as it covers all these tools in one package.
Preparing to Change the Tire
Before changing the tire, ensure you are in a safe location away from traffic. Look for a flat, stable surface even if this means driving slowly with a flat tire to a safer spot. Turn on your hazard lights to alert other drivers.
Once parked, engage the parking brake and place wheel wedges under the opposite tires of the one you’re changing; for example, if changing the right front tire, wedge the left rear tire.
Removing the Flat Tire
Loosen the Lug Nuts: Before jacking up the car, loosen the lug nuts with the lug wrench by turning them counterclockwise. Do not remove them completely—just break the resistance.
Lift the Vehicle: Place the jack under the vehicle frame near the tire that you’re changing. Vehicles typically have a specific spot on the frame where the jack should be placed, as indicated in the owner’s manual. Pump the jack to lift the tire off the ground. Ensure the tire is high enough to install the spare easily.
Remove the Lug Nuts and Tire: Once the vehicle is lifted, remove the lug nuts completely. Keep them in a safe place—inside a hubcap or pocket works well. Pull the tire off the hub and set it aside.
Installing the Spare Tire
Attach the Spare Tire: Lift the spare onto the hub, lining up the holes, and push gently until the lug bolts show through the rim. Replace the lug nuts by hand and tighten them lightly.
Lower the Vehicle and Tighten the Lug Nuts: Use the jack to lower the vehicle so the spare tire begins to take the car’s weight but is not fully loaded. Tighten the lug nuts with the wrench, following a star pattern to ensure the tire is evenly balanced and securely attached. Finally, lower the vehicle completely and give the lug nuts one last pull with the wrench to ensure they are as tight as possible.
Post-Installation Checks
- Place all tools back in your vehicle’s storage. This includes the jack, lug wrench, and any wheel wedges.
- Use your tire gauge to check the pressure in the newly installed spare tire. Inflate it to the recommended pressure if it is low.
Always prioritize your safety over changing the tire quickly, especially under adverse weather conditions or on busy roads. If you feel unsafe, it’s wise to call for roadside assistance.

Matthew Dowell
Matthew, a seasoned builder from a family of craftsmen, leads Tools Trove. His passion for tools and decades of hands-on experience fuel his commitment to providing expert reviews and insightful content. Whether you’re a pro or a DIY enthusiast, Matthew’s guidance ensures informed decisions in the world of tools.


